

In the previous blogs, I discussed the fundamentals of network penetration testing and the meticulous planning required before diving into an assessment. In this next phase, I shift focus to the initial steps in gathering intelligence about the target without direct interaction. Passive reconnaissance is the silent precursor, laying the groundwork for a comprehensive understanding of the client's potential attack surface and vulnerabilities before any active engagement.
My Process
Having a well-defined process for passive reconnaissance is paramount in network penetration testing. This initial phase, though seemingly subtle, lays the foundation for the entire assessment. A structured and systematic approach ensures that no crucial information is overlooked or neglected. It serves as a strategic roadmap, guiding the tester through the intricate web of domain information, IP addresses, and potential attack surfaces.
Before anything else, I always start with preparing my Kali Linux machine for each individual test. In the Pentesting 2: Planning blog, I provided an image of my file directory structure for each client project.
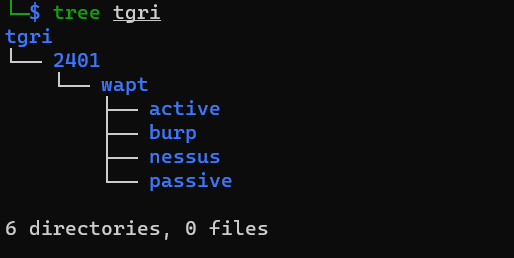
Let me help explain this structure. In the example above, tgri is the client. Next, we see 2401. This lets me know during which year and month this project takes place (i.e., 2024, January (01)). Under that, wapt is the type of service (Web Application Penetration Test). And finally, under that, are the folders active (Active Reconnaissance), burp (where I store my Burp files), nessus (where I store Nessus files), and passive (where I store all my passive reconnaissance results).
Structuring it this way helps me stay organized.
In the wapt folder, I usually create 2 files: scope.txt and scope-ip.txt. The first file contains scoped domains, while the other contains IP addresses. Let me first say that I know this is not necessarily the most efficient (ideally, I would JSON to create a dictionary for domains with a list of IPs in it). I'm working on that, but for the sake of this blog, I'm going to keep it simple.
In the last blog, I mentioned using a scenario. Imagine, for the sake of this blog, I am conducting a Web Application Penetration Test (WAPT) for Techno Global Research Industries (TGRI). They've given me the SOW that includes the ROEs, as well as a questionnaire that provides the scope. I'm testing their staging domain at https://staging.techglobalresearch.com. Note: I set up OWASP's Juice Shop web application for this domain.
Assign the Environment Variables and Scope
Because I tend to have a lot of output files that follow a specific naming convention, and I don't like to write the client name and other information every time I run a command, I set a few environment variables.
export client=tgri
export YYMM=2401
export service=wapt
export url=staging.techglobalresearch.com
export ip=64.23.174.224
export project=$client-$YYMM-$service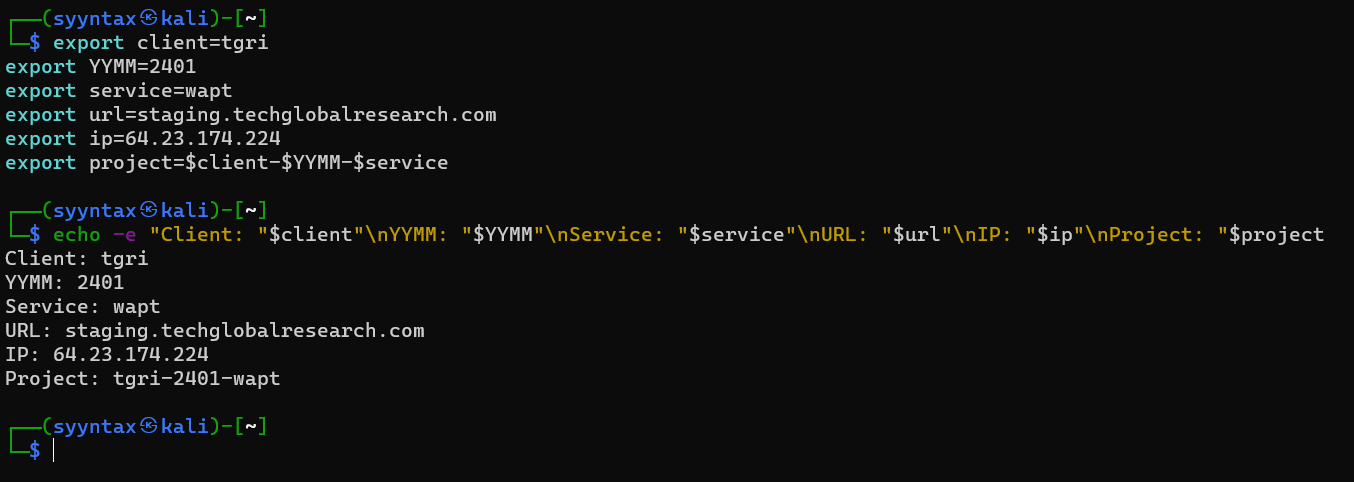
Next, I add the domain to scope.txt and the IP address to scope-ip.txt using nano.
Once I've got all the organizational stuff out of the way, I move out to the next step: scope verification.
Scope Verification
Scope verification is a crucial step in a penetration test as it establishes the boundaries within which the assessment will operate. Ensuring accurate and well-defined scope is paramount to the success and integrity of the test. It provides clarity on the assets, systems, and networks that are considered fair game for evaluation. This process helps prevent unintended consequences, such as testing against unauthorized systems or disrupting critical services. Clear scope verification aligns the expectations of both the client and the tester, promoting a transparent and efficient engagement. It mitigates potential legal and operational risks by avoiding unintentional impacts on production environments. Ultimately, scope verification is the foundational step that sets the rules of engagement, enabling a focused and effective penetration testing process.
Third-Party Resources
Sometimes, I'll have a pentest where the target is, for example, staging.techglobalresearch.com, but authentication occurs via auth.techglobalresearch.com. This second domain was not identified in my scope from the client. This is where I speak with the client and let them know that I typically run dictionary attacks as part of my testing. Often times, the client will tell me not to perform dictionary attacks since auth.techglobalresearch.com is not in scope. This most likely occurs when some third-party (such as Microsoft) is responsible for authentication.
Scope Validation
I use BGP Hurricane Electric Internet Services and nslookup to validate that the IP given matches the right company. I validate scoped IPs against WHOIS data and gather information about the owning company. Scoped IPs are consolidated in scope-ip.txt.
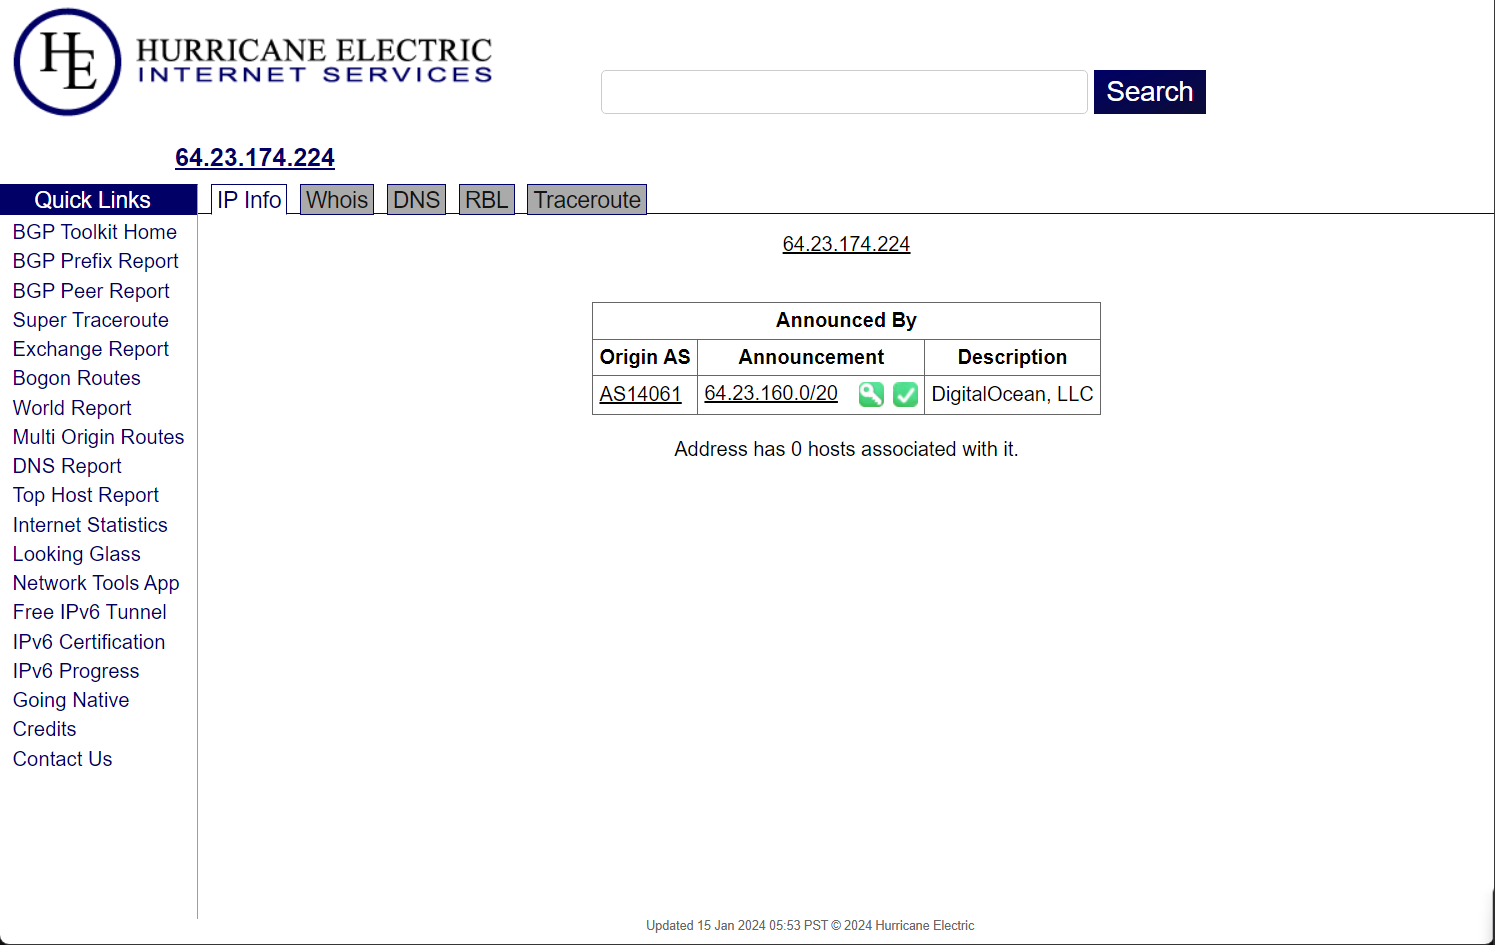
This is just me, but if I don't know where the client's target is hosted (i.e., Azure, AWS, etc.), I'll confirm with them again. I've had instances where clients will typo their IP or give an old IP that now no longer belongs to them. It's always important to check and double-check to keep things legal.
Shodan
I leverage Shodan to obtain additional insights into scoped IPs. I use the following shodan command in Kali Linux:
shodan host $ip --format pretty -O $project-shodan-$ip.txtThis command generates detailed results for further analysis. In our scenario, this is what shodan gives me for the IP address associated with staging.techglobalresearch.com.
Amass
Amass aids in constructing a detailed map of the client's digital footprint, enhancing the overall understanding of the attack landscape. Its inclusion in passive reconnaissance allows pentesters to identify potential vulnerabilities and points of entry, contributing to a more thorough and effective assessment of the target's security posture.
Running amass uncovers potential attack surfaces within the client's domain, providing a comprehensive overview. Amass is not installed by default in Kali, but installation instructions can be found on GitHub.
I run amass using the following command:
amass enum -ipv4 -d $url -src -json $project-amass-$url.json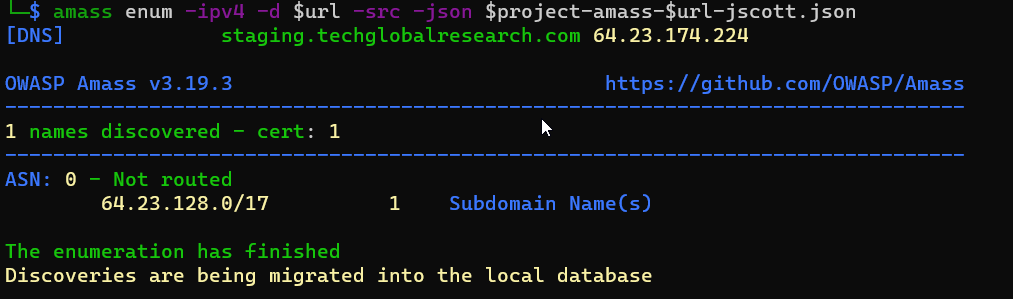
Email Harvesting
Email harvesting helps identify potential points of contact and information about individuals associated with the target domain. Harvested emails can be leveraged for social engineering, targeted phishing attacks, or further reconnaissance, providing valuable insights into the organization's personnel and communication structure. I tend to collect emails to build tailored dictionaries from which to run dictionary attacks on any discovered login pages.
theHarvester
I employ theHarvester to extract emails and associated IPs for the scoped domain. Below is the command that I run.
theHarvester -d $url -b all -l 1000 -f $project-theharvester-$url.htmlPhonebook.cz
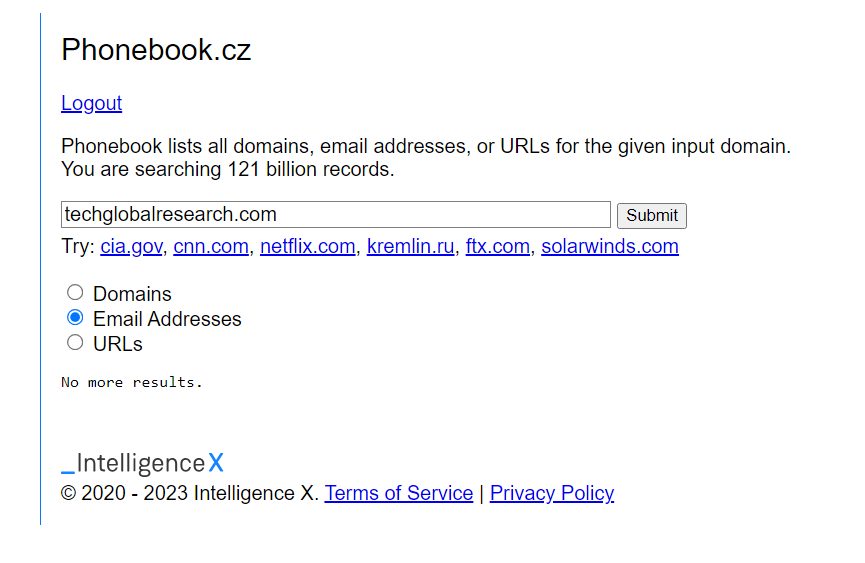
I utilize the Phonebook.cz website to discover additional email addresses associated with the scoped domain. I usually only search for the root domain (i.e., techglobalresearch.com), since it's uncommon to see email addresses on subdomains.
Compromised Passwords
Checking for compromised passwords in public dumps is essential for identifying potential security risks. It helps uncover any instances where email addresses associated with the target domain may have been exposed in previous data breaches. This information is valuable as it can be discovered by anyone - including potential attackers.
I use DeHashed to find compromised passwords. The downside to using DeHashed is that it requires an account and is a paid service. There are free-to-use password dumps, but DeHashed is my tool of choice and it works great!
I use my API key from DeHashed to run the following curl command to get any compromised passwords in a JSON file.
curl 'https://api.dehashed.com/search?query=email:'$url \
-u <email>:<api key> \
-H 'Accept: application/json' > $project-dehashed-$url.json
The results can be a little hard to sift through since you'll get information beyond just passwords (i.e., usernames, addresses, password hashes, etc.) I wrote my own Python script that parses this data and outputs the email and associated password in a separate file.
Conclusion
Passive reconnaissance lays the foundation for a comprehensive understanding of the client's attack surface. The collated data serves as a strategic resource for informed decision-making during subsequent active reconnaissance. Stay tuned for Part 4, where we delve into active reconnaissance techniques.